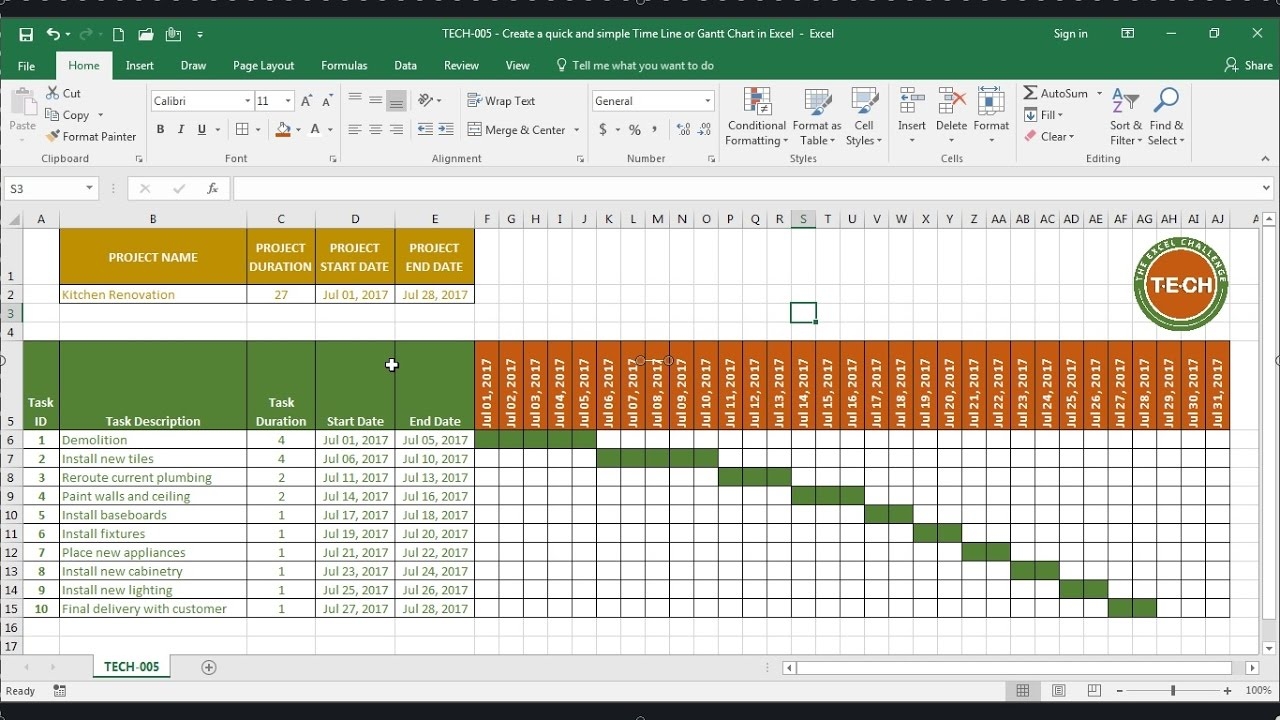
Before creating a chart with time in Excel, you need to make sure your data includes a time component. This could be in the form of hours, minutes, seconds, or even dates and times. Start by entering your time data into a column or row in your Excel spreadsheet.
To ensure Excel recognizes the time data correctly, you may need to format the cells as time. Right-click on the cells containing your time data, select Format Cells, and choose the appropriate time format from the Number tab.

2. Selecting the Data for Your Chart
Once you have your time data in place, you can proceed to create your chart. Select the range of data you want to include in your chart, including both the time data and any corresponding values you want to visualize. Make sure to include headers for clarity.
Next, go to the Insert tab on the Excel ribbon and choose the type of chart you want to create. Select a chart type that best represents your data, such as a line chart for tracking changes over time or a bar chart for comparing different time periods.
3. Formatting Your Excel Chart
After inserting your chart, you can customize its appearance to better communicate your data. Right-click on various elements of the chart, such as the axes, data points, or legend, to access formatting options. You can change colors, fonts, labels, and more to make your chart visually appealing and easy to understand.
Consider adding titles, labels, and a key to help viewers interpret the information presented in your chart. You can also adjust the scale of the axes to highlight specific trends or patterns in your time data.
By following these steps, you can create an Excel chart with time that effectively visualizes your data and helps you gain insights into trends and patterns over time.

Download Excel Chart With Time


